Categories
Health and Beauty

Going Natural, the First Step…

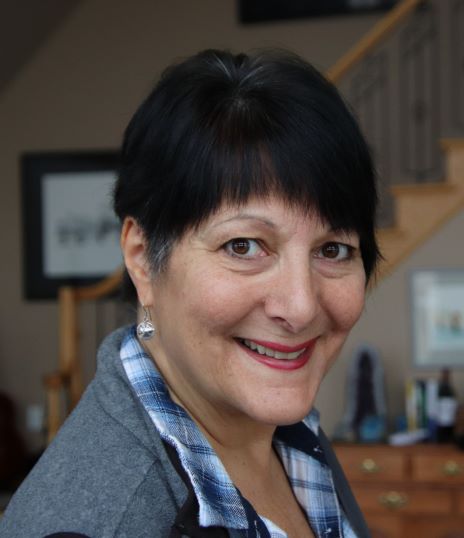
So, here’s a photo of the first step of my transition from dyed to natural… going from long to short to lessen the time it will take to grow out. I enjoyed all the comments on last week’s blog with the “before” photo and I hope my story will help those of you who have been thinking of making the change too.

Getting help from a professional…

My hairdresser is helping me through the transition, making the change easier by using her styling skills. Since most of my grey is at the temples, she cut the sides very short, getting rid of much of the dyed hair. But she left the top longer to cover the newly shortened grey hair, so just a bit peeks through. This is called an “undercut” style and it’s quite popular right now. I expect the next cut will show more grey but, what the heck, I might just keep this undercut style for a while.

But not everyone has a greying pattern like mine with mostly the original colour on top. And, actually, that’s one of the reasons I decided to do it now—because I thought it would be easier if I didn’t have to worry so much about having a white stripe on top!

When you’re ready to go natural, a consultation with a hair stylist is an important part of the plan. For example, a friend with most of her colour change on the top had the colour stripped from her hair, leaving it lightened to the colour of her roots. This way she was able to keep the length of her hair while softening the line at the colour change.

Lots of options

Some women would look great by adding platinum streaks that would blend with the grey as it grows out. Others might look great by just going completely silver-grey or platinum (popular colours these days) and letting the dark grow in.

Fortunately, there are lots of options for us! The key is to be able to predict what your natural colour is and where it has changed. And after years of hair dye, the only way to know is to let it start to grow. Try covering the most obvious root areas with temporary colour—hopefully you’ll have better luck on this than I did—wash it out before your consultation and ask your hair stylist for some suggestions. I let my colour go for 2 months before getting my cut and wore my long hair down most of the time, rather than twisting it up as I often did, as this helped cover the roots at the sides.

Many chemicals pass through the skin

One thing I learned as a compounding pharmacist, is that the skin is not as much of a barrier to chemicals as we’d like to think. I often made medicines that were administered as a cream or gel and were intended to act on muscles and nerves under the skin or throughout the body. With some, nothing special was needed to help the active ingredient pass through the skin. It certainly bothers me when I read that cosmetics, including hair dyes, are not as well tested as medical products. Especially since we use these products regularly for years, some of them daily. Even though hair colours are noted for causing severe allergic reactions and can cause blindness if used near the eyes, companies are exempt from responsibility as long as they have a statement describing these reactions on the label and tell users they must do a skin patch test 24 to 48 hours before use every time.

We deserve to have safe cosmetic products. But how do you know what’s safe? Here are some things you can do:

  • Choose simpler products—those with fewer ingredients and with ingredient names you can pronounce. Avoid added fragrances, as these are additional chemicals that usually do not contribute to the action you want from the product.

  • Consider making your own—some products, like salt/sugar rubs or body oils are easy to make. Be sure to make small amounts that will be used in a reasonable time, as homemade products usually do not contain preservatives, allowing bacteria to grow in the product. Use a small clean spoon to scoop out the amount you need to help to prevent bacteria from getting into the product.

  • Learn about cosmetic ingredients. Read labels carefully. Research ingredients. Suggestion: try out the free Think Dirty app (featured on Dragon’s Den) which has an analysis of many North American cosmetics and rates safety of ingredients.

  • Join the campaign for safe cosmetics and beauty products, like shampoos and moisturizers. Demand safer products where you shop and better regulation from government. Check out this video: The Story of Cosmetics

PS: We Canadians spell “color” with an extra (rather useless!) “u” like the British… This article has lots of little red underlines throughout!

References:

Safe Cosmetics.org

The Story of Cosmetics

Red List of chemicals to avoid

Categories
Health and Beauty

8 Ways to Keep Your Skin Younger and Healthier

Your genes will always have some influence on skin getting drier and thinner regardless of what you do, but there are preventive actions you can take to slow the effects of “extrinsic” aging, the aging caused by factors outside your body… limiting the effects of environment and making the best lifestyle choices for healthy skin!

Here are 8 ways to help keep your skin as healthy and youthful as possible:

  1. Protect your skin from the sun every day – sun or cloud, winter or summer.

    1. UVB rays result in a tan or sunburn and are largely blocked by cloud, while UVA rays can often pass through cloud or glass damaging skin without causing a visible burn or tan.

    2. Use a cream or lotion daily that contains SPF 15 to 30, depending on the sensitivity of your skin to sunlight, plus an effective UVA blocker (Note that “SPF” refers to effects on UVB rays only). Apply daily to your face and hands – the most exposed areas of the body.

    3. Wear a wide-brimmed hat to further reduce sun exposure to the face and neck.

    4. Like a tanned look? Try a self-tanner – they’re much improved from earlier versions, giving a more natural skin tone and won’t damage your skin.

    5. Avoid tanning beds and lamps – they also cause skin damage and aging.

    6. Remember the sun is strongest between 10am and 3pm, and you will need greater protection during these hours.

  2. If you smoke – stop!

    1. Toxins in cigarette smoke speed skin aging.

    2. Smoking can cause a dull, sallow complexion and decreased blood flow to the face resulting in less healthy skin.

    3. Preventing aging is yet another good reason to quit!

  3. Pay attention to your facial expressions – especially frowning…

    1. Repeated frowning, squinting or pursing of lips creates skin folds or lines that eventually become permanent.

    2. Watch for lines that indicate facial muscles you frequently use:

      1. Between brows – frowning

      2. “Crows’ feet” at corners of eyes – squinting (wear sunglasses to reduce this)

      3. Lines radiating from your mouth – pursing lips

    3. Smiling uses far fewer facial muscles, so avoids potential lines and wrinkles…and brightens your day and that of everyone around you at the same time!

  4. Eat a healthy diet

    1. Fresh fruit and veggies provide nutrients needed for healthy skin:

      1. Vitamin C is needed to form collagen, part of the support structure of skin.

      2. Vitamins E, A and Biotin (a B vitamin) are also important for skin.

      3. 5 to 7 servings of fruit and vegetables daily will generally provide enough of these nutrients to help keep skin healthy (although a new study suggests that 3 to 4 servings may be adequate for maximum health benefit – stay tuned for recommended dietary changes in the future!).

  5. Limit Alcohol – Alcohol is reported to dehydrate skin, making it look more aged.

    1. Avoid binge drinking, drink only in moderation (1 to 2 drinks per day), and keep hydrated by drinking water along with alcohol.

      1. A guideline could be one glass of water for each drink, for example.

  6. Exercise on most days

    1. Exercise boosts circulation and immune function throughout the body, including the skin

    2. Incorporate activity into your daily routine.

      1. It may give your skin a more youthful appearance.

      2. And, being fit looks good at any age!

  7. Cleanse skin

    1. Many references suggest cleansing gently but thoroughly to remove makeup, sweat and bacteria without irritating skin.

    2. However, exfoliating (gently removing the outer layer of dead skin cells) has long been used to give skin a fresher, smoother surface.

      1. Exfoliating before applying a moisturizer may help the moisture to penetrate the skin more readily.

      2. Author’s note: I have used a “buff puff” type sponge to cleanse daily for many years with good success, originally to keep pores open to prevent blemishes, but I continued to use it for its exfoliiant action. This might not be an option, however, for those with very sensitive skin, although “gentle” versions are available.

  8. Apply a facial moisturizer every day.

    1. Even an inexpensive facial moisturizer will help maintain hydration of the skin, giving a more youthful appearance.

    2. Using a moisturizer with sunscreen added can simplify your skincare regimen — 2 steps in one!

    3. Drinking water regularly also helps keep skin hydrated. Avoid bottles or straws that cause you to “pucker up” your mouth when drinking (see #3!)

Having compounded cosmetics for several years in my pharmacy, I have a few “favourite” skin ingredients:

  • DMAE – helps to tighten the tiny muscles that support the skin temporarily (12-24 hours)

  • Glycolic Acid – help loosen dead skin cells on the surface of the skin, creating a smoother surface (not recommended for those with sensitive skin, and use with caution in eye area)

  • Lipoic Acid – reported to help improve dark circles under the eyes

  • Vitamin C Ester – helps with collagen formation to prevent thinning of the skin (the ester form is better in creams as it can pass through skin easier and is less irritating than plain vitamin C)

These are inexpensive ingredients, so you can likely find reasonably-priced creams containing some of these.

Keep in mind that sun exposure is considered the greatest avoidable cause of skin aging and damage. Brown “age” spots (also referred to as “liver” spots) are a visible indication of sun damage. If numerous spots appear, ask for an assessment by a dermatologist. These spots can be removed with a prescription strength peeling agent targeted to the damaged area – ask your doctor!